Documentation.
Everything the SMTP screen links to: setup, the delivery chain, providers, logs, Live Test, and self-hosting. Plain language, no jargon.
Contents
- Installation
- The delivery chain
- Adding a provider
- Settings
- Email logs
- Live Test
- Self-hosting the verifier
- FAQ
1. Installation
- Install the plugin from the WordPress plugins screen (search for "Email Cascade") or upload it to
/wp-content/plugins/email-cascadeand activate it. Requires WordPress 6.4+ and PHP 8.1+. - Open Email Cascade > SMTP and click Add New.
- Pick a provider and fill in its details (see below).
- Enable the configuration and use the arrows to place it where you want in the chain.
- Validate your From address with the provider (in Brevo: Senders, Domains and Dedicated IPs).
- Send a test (for example trigger a password reset) and confirm it arrives.
2. The delivery chain
Every email WordPress sends is routed through your configurations from top to bottom. If one fails, the next automatically takes over. The built-in PHP sender sits in this list too: you can reorder it and switch it on or off, but it cannot be deleted, so your emails always have a fallback. The chain is never empty: if every other configuration is disabled, PHP re-enables itself as the last resort.
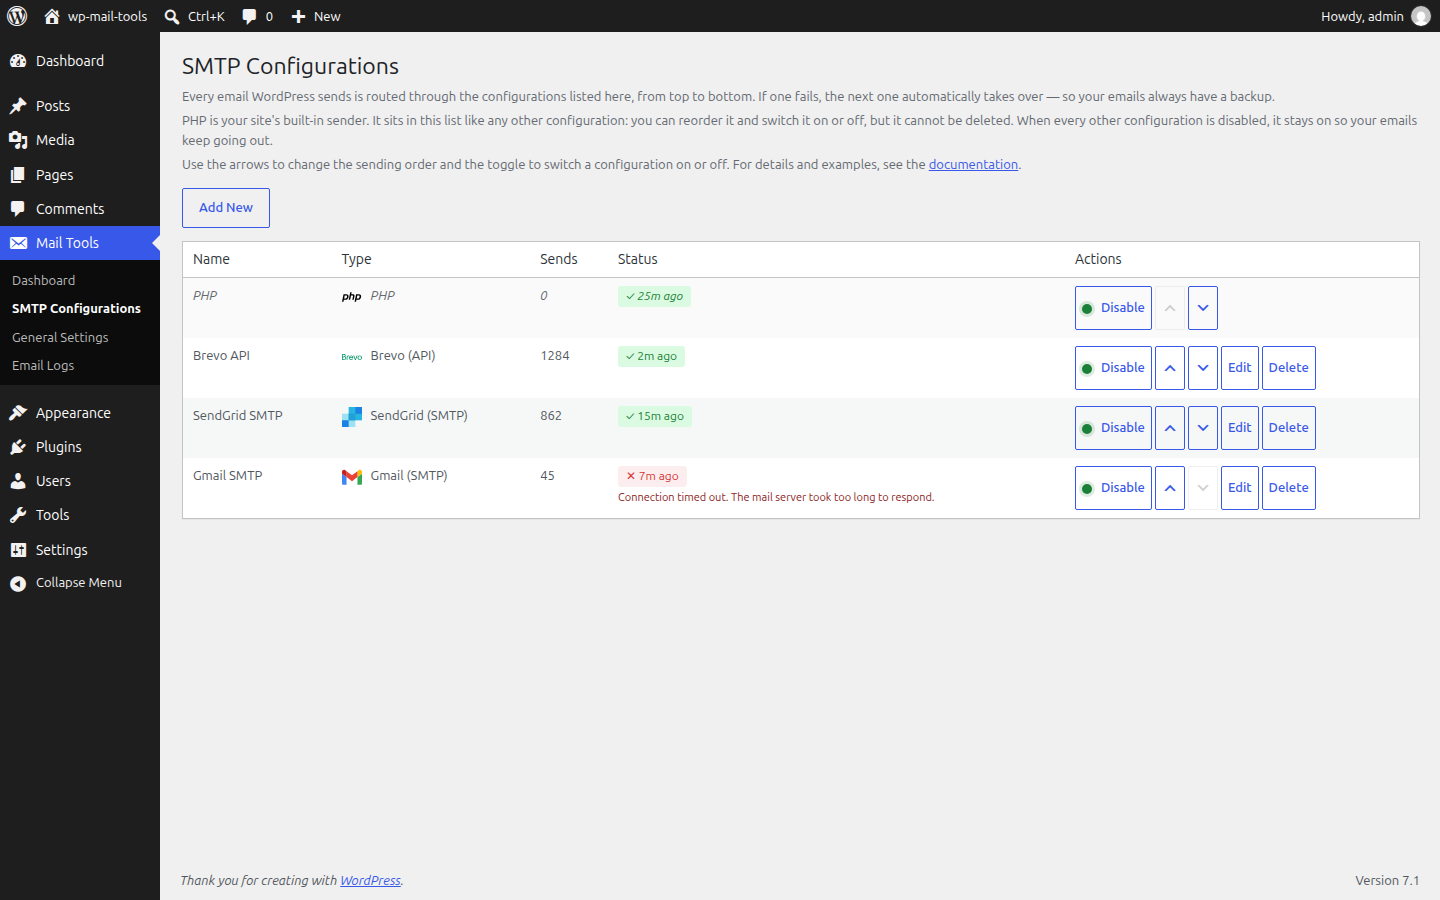
3. Adding a provider
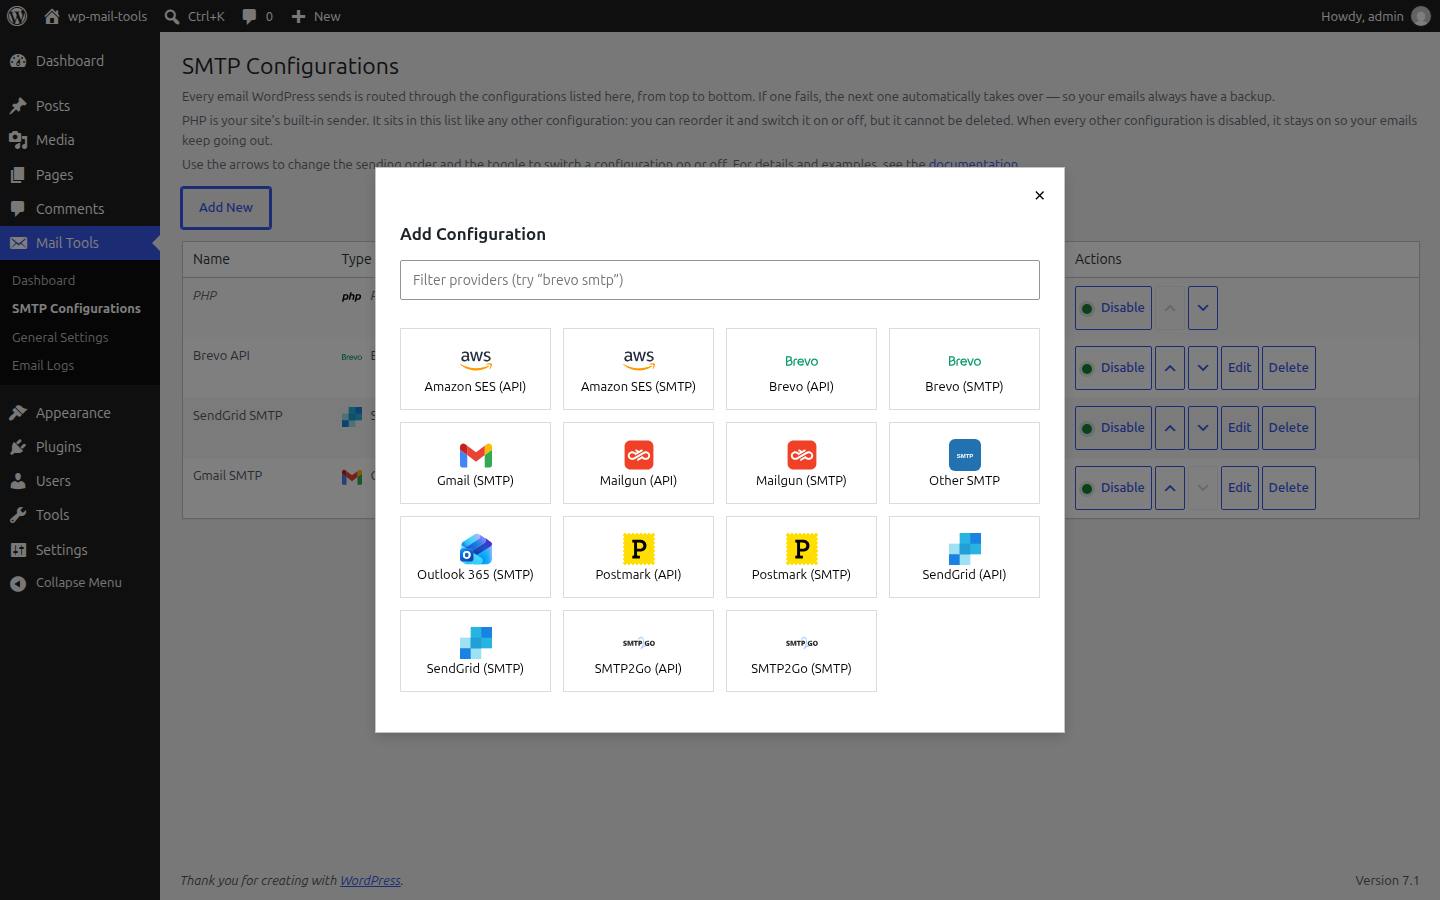
Click Add New and pick a preset. You need credentials from the provider first:
- Amazon SES (API): AWS region, access key and secret key.
- Amazon SES (SMTP): AWS region, SMTP username and password.
- Brevo (API): your Brevo API key.
- Brevo (SMTP): your Brevo login and SMTP key.
- Gmail (SMTP): your Gmail address and an App Password.
- Mailgun (API/SMTP): your Mailgun domain and API key or SMTP credentials.
- Outlook 365 (SMTP): your Outlook email and password.
- Postmark (API/SMTP): your Postmark Server Token.
- SendGrid (API/SMTP): your SendGrid API key.
- SMTP2Go (API/SMTP): your SMTP2Go API key or SMTP credentials.
- Other SMTP: any SMTP server: host, port, encryption (None/TLS/SSL) and optional username/password.
- PHP: your server's built-in mail transport, always available as the fallback. It needs a working mail stack on the host; most containers and local environments do not have one, which is why a real provider should sit first in the chain.
WordPress-generated emails (password resets, notifications) carry no From header. The plugin fills those in with your site's administration address and site name, while explicit From headers set by themes and plugins are always respected.
4. Settings
Under Email Cascade > Settings:
- From Email / From Name: site-wide sender identity applied to all outgoing mail. Set these for SPF/DKIM compliance.
- Force From: overrides From headers set by other plugins. Use only when you need strict sender enforcement.
- Log retention: how long email logs are kept (1 to 30 days, default 7). Older entries and their files auto-purge daily.
- Live Test: opt-in toggle, check interval (1 to 72 hours, default 6), and the verifier URL. See Live Test.
The plugin respects the standard wp_mail_from and wp_mail_from_name filters, and fires email_cascade_primary_failed when every configuration fails.
5. Email logs
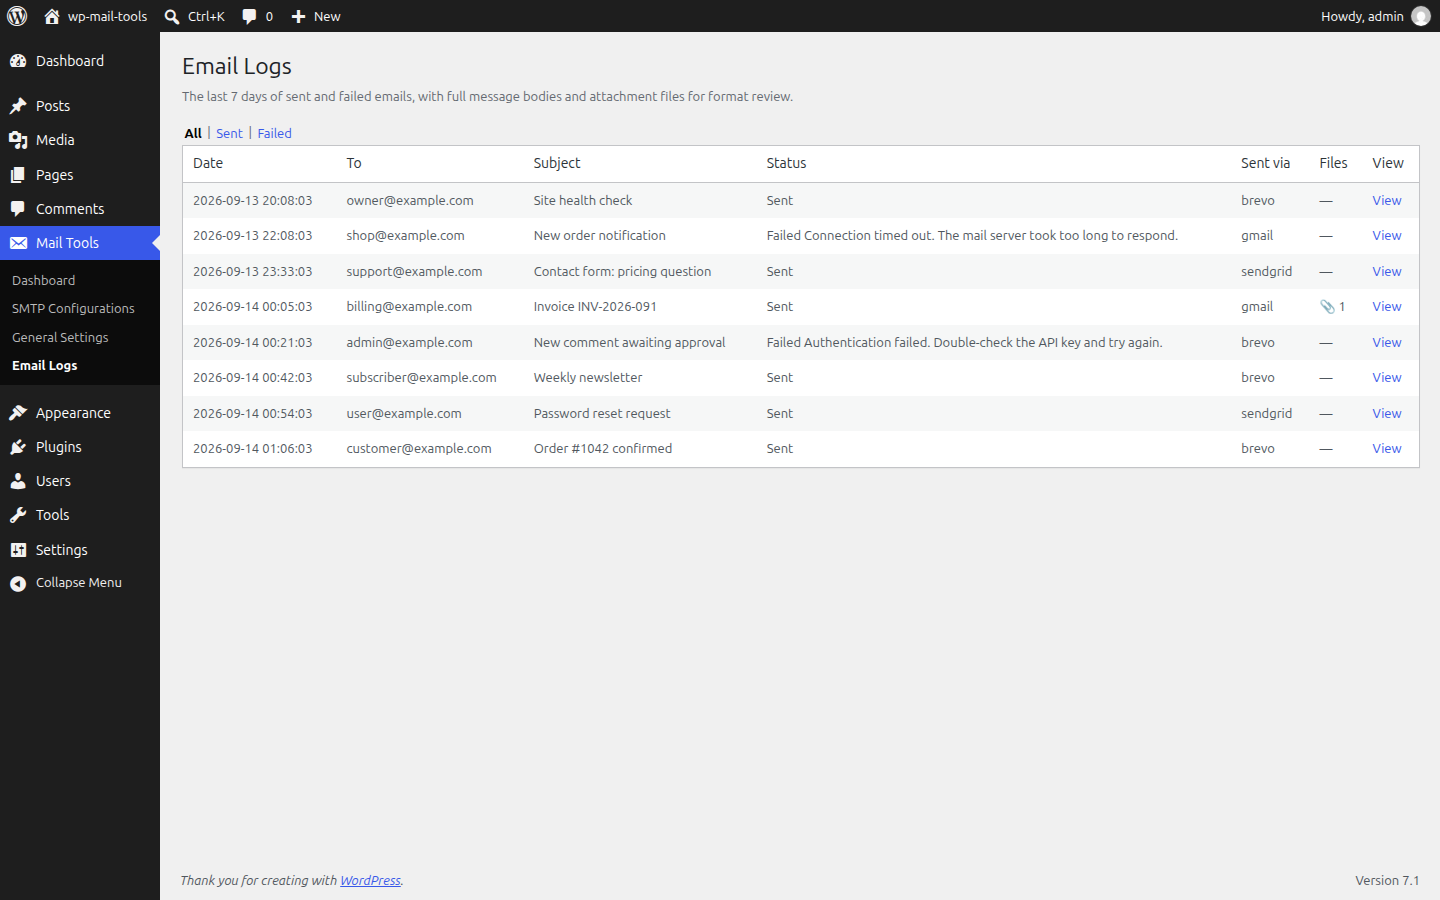
Every send is logged with status, recipient, subject, provider used, error messages, the full body, and attachment files. Browse and filter under Email Cascade > Logs, open any entry to see it rendered or as source, and download attachments. Live Test emails are skipped so they never pollute the log.
6. Live Test
Live Test proves each enabled configuration actually delivers. When enabled, the plugin periodically sends a tiny verification email through that configuration only (no fallback, so a green badge is always attributable) to a random one-time address, then long-polls the verifier for arrival. Results show in the Status column: green for delivered, red for failed with the error on hover, plus queued and testing states.
Live Test privacy
- What is sent: one short test message per enabled configuration. It contains no personal data, just the subject "Email Cascade Live Test". No provider info and no site URL leave WordPress.
- What is stored: the verifier records only delivery status, byte size, and timestamp, for five minutes, then deletes them.
- Accounts and tracking: none. Authentication is a signature over your own WordPress salts, which never leave your site. The feature is off by default.
- Opt out: turn Live Test off in Settings at any time; no further test email is sent.
7. Self-hosting the verifier
The verifier URL in Settings defaults to https://verifier.email-cascade.kadimi.com.
Change it only if you run your own verifier. The contract it must speak:
POST /api/v1/slotreturns{id, target_email, view_url, expires_at}(slots live 300 seconds).GET /api/v1/inbox/:id/waitlong-polls up to 30 seconds for{received, size_bytes}.POST /api/v1/inbox/recipient/:addressdelivers inbound mail by recipient address, gated by the sharedPIPE_TOKENsecret in theX-Pipe-Tokenheader. SetEMAIL_DOMAINto the domain you receive mail for.GET /healthreturns{status:ok,service:verifier}.
Questions about self-hosting: ask via the support page.
8. FAQ
What happens if my primary provider goes down?
The next enabled configuration in the chain takes over automatically. If every enabled configuration fails, the send is logged with the provider's error message, so you can see exactly what went wrong.
Why is my email still not delivered?
Providers reject senders that are not validated. In Brevo, add and confirm your sender address (or validate your whole domain) under Senders, Domains and Dedicated IPs. WordPress-generated emails use your site's administration email address as the sender, so make sure that address is validated.
Can I have more than one provider configured?
Yes, that is the whole point. Add as many configurations as you need, order them, and enable the ones you want in the chain.
Can I disable PHP?
You can toggle it off like any other configuration, but while no other configuration is enabled it stays on: the plugin never leaves your site without a sender. It can never be deleted.
Does PHP need anything special?
It uses your server's built-in mail transport, so your host needs a working mail stack. Many shared hosts provide one; most containers and local environments do not, which is exactly why a real provider should sit first in the chain.
Does it log emails?
Yes. Every send is logged (status, recipient, subject, provider, error, full body, attachments) and viewable under Email Cascade > Logs. Retention is configurable and old entries auto-purge daily.
What is Live Test and what data does it send?
When you opt in, the plugin emails a short test message through each enabled provider to a random one-time address. The message contains no personal data. The verifier records only the delivery status, byte size, and timestamp for five minutes, then deletes them. No account is required and nothing is tracked. The feature is off by default.